An ASCII Art Printer Made From an Old Typewriter
February 11, 2025
This post was translated into English by AI. Read the original →
Project description
In the module Advanced Media Informatics 2, I converted an old digital typewriter — a Smith Corona XL 1875 with an Intel P8052AH microcontroller — into an ESP32-controlled ASCII art printer. Instead of typing text on the keyboard, an ESP32 deliberately simulates keystrokes so the typewriter prints an image line by line as ASCII art on paper.
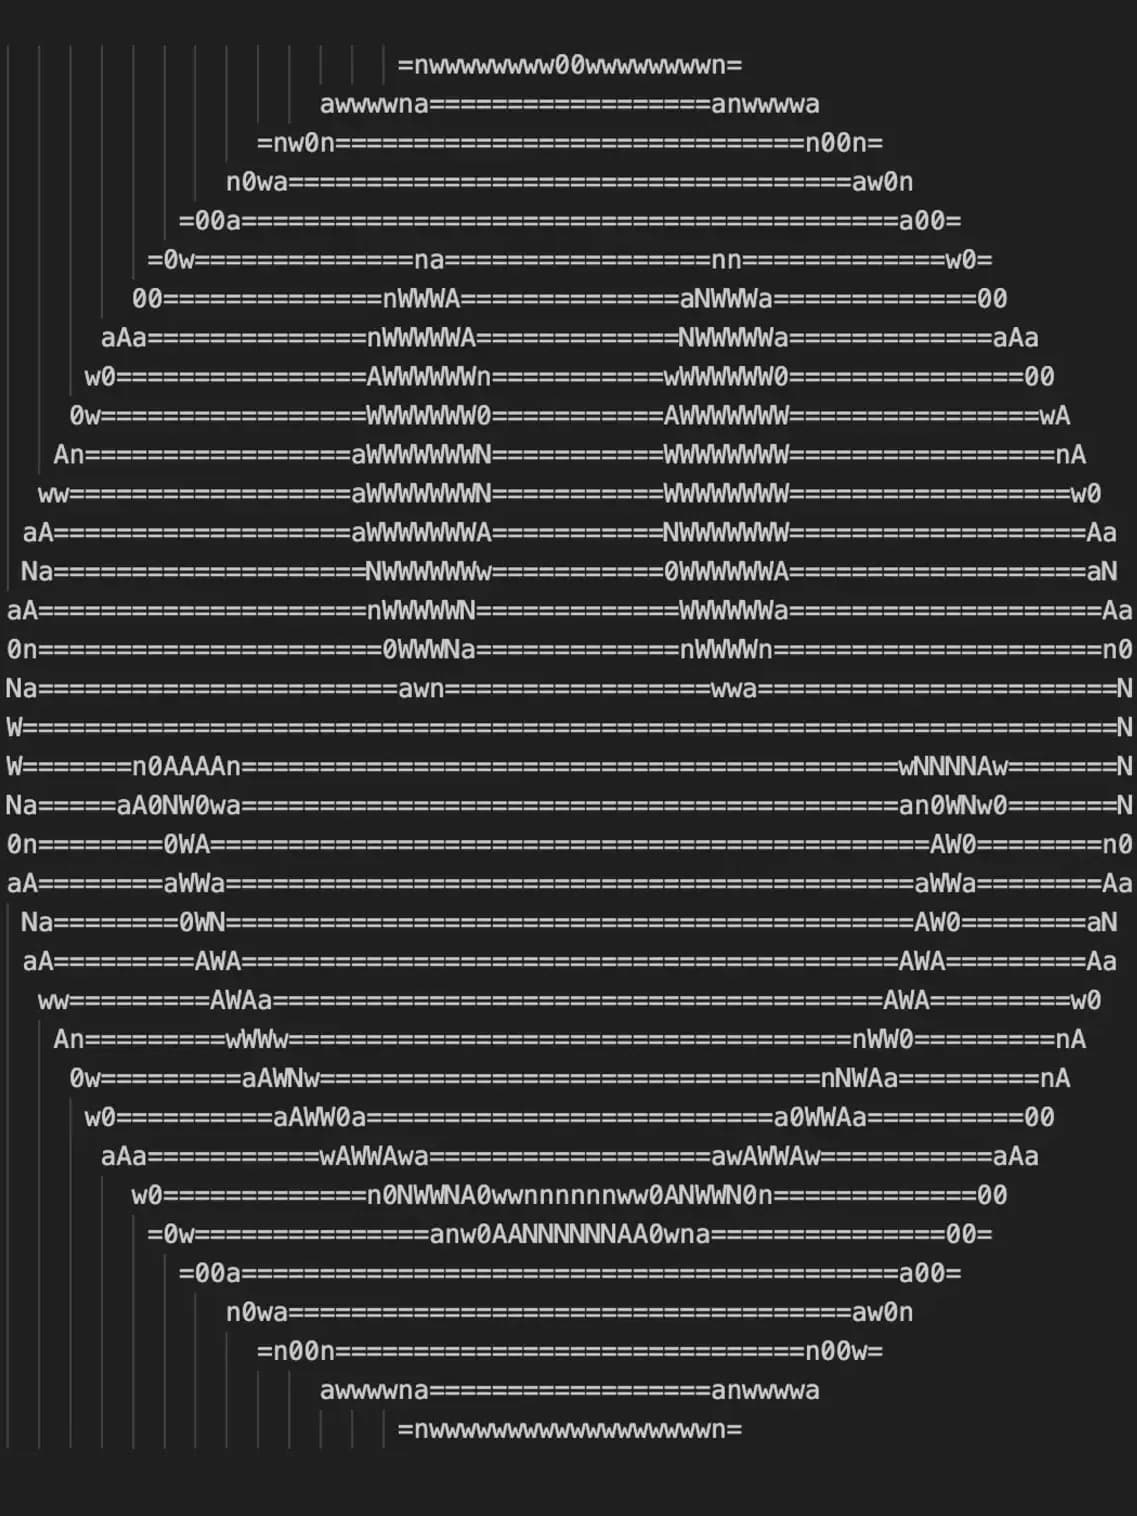
The result is a device that turns a digital photo into an analog rendering printed with nine characters — line by line, with the characteristic sound of a mechanical typewriter.
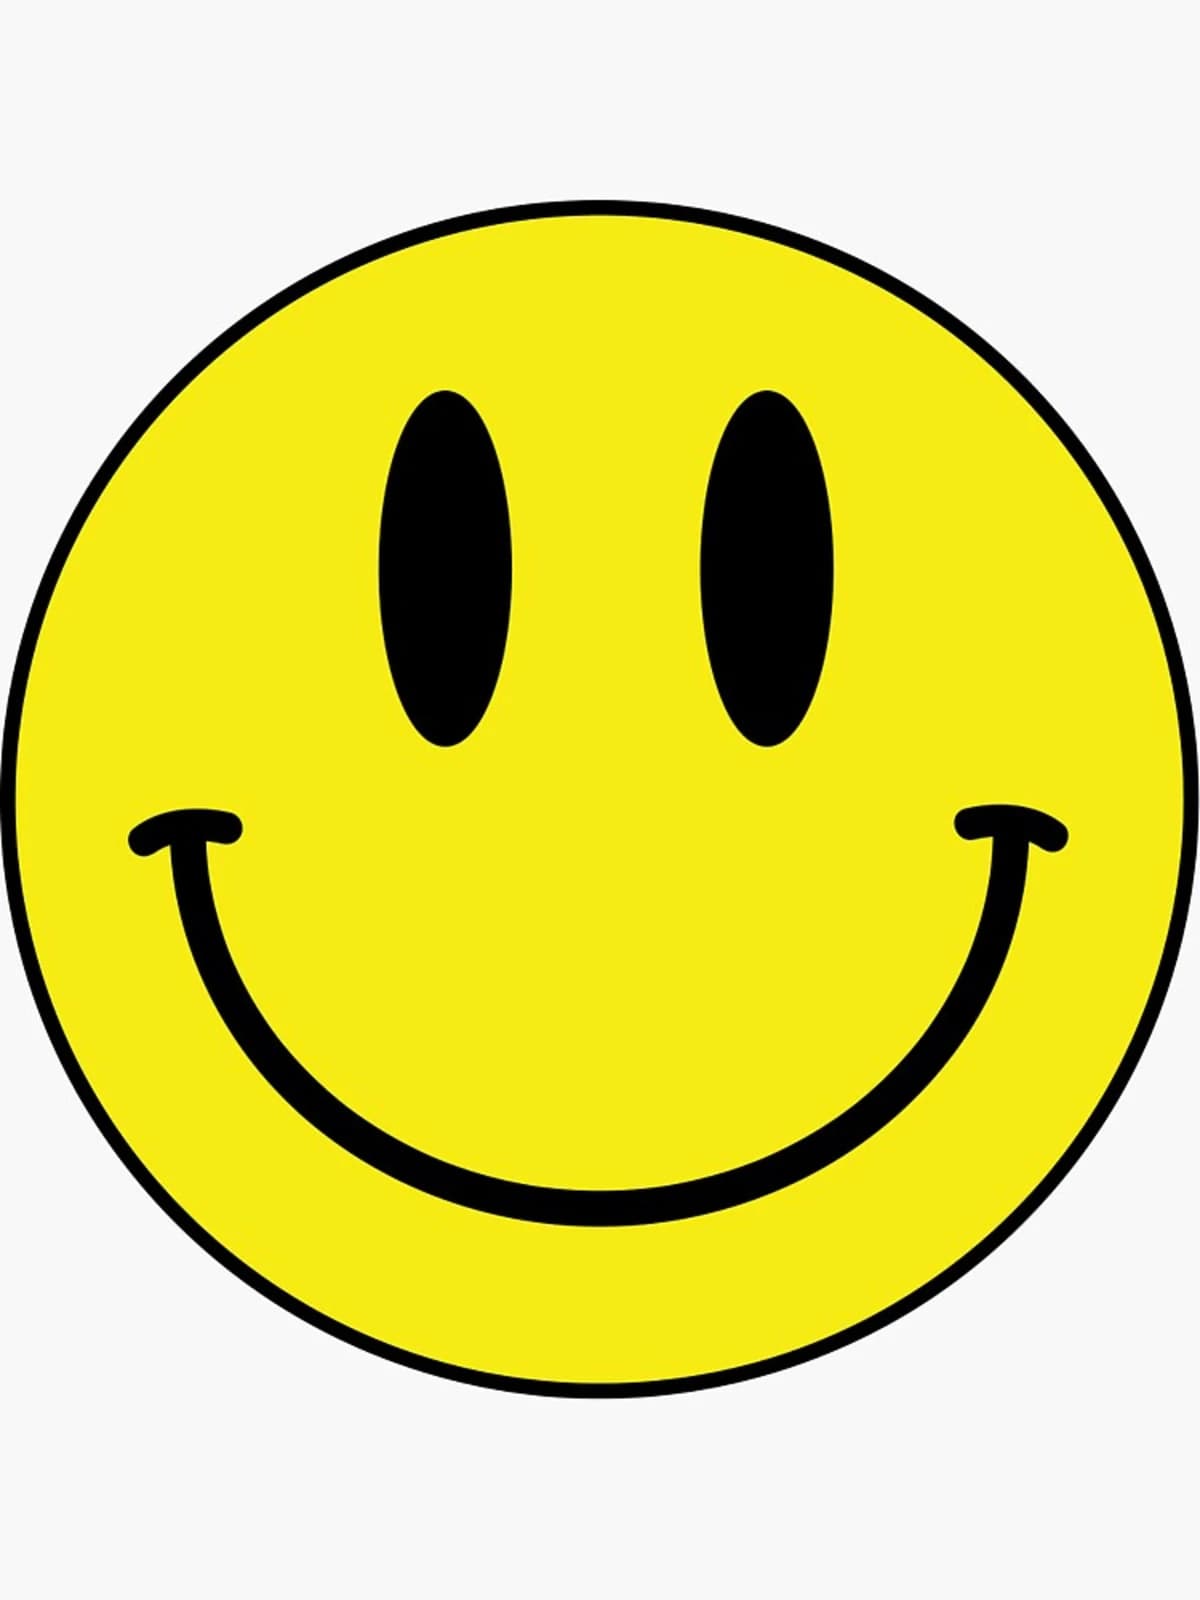
The source image that was converted into ASCII art and then printed.
The original idea: a chatbot on the typewriter
Originally I wanted to build something different: an AI chatbot operated through the typewriter's keyboard. The idea was to read keystrokes, send them to a language model, and output the response back onto paper via the printing mechanism — a chat completely without a screen.
For that, I first had to understand how the keyboard even works. The mainboard is connected to the keyboard via a ribbon cable, wired internally as a matrix with around 56 keys. By deliberately short-circuiting individual pins and measuring the voltages at the keys, I reconstructed the matrix step by step — seven rows of seven keys each, from "k l ö ä m , ." through the number row to the shift and backspace keys.
The problem only showed itself once I started thinking the solution through end to end: to simulate all keys electronically, I would have had to replicate the complete matrix — eight polled outputs and seven read inputs. In practice that would have been around 54 transistors and 18 occupied ESP32 pins, to both detect keystrokes and trigger new ones. For a module of this size, that was simply too much scope.
From chatbot to ASCII printer
Instead of abandoning the project, I reworked it: if I can't drive all the keys, maybe it's enough to trigger a few deliberately — enough to "paint" images with them. So the chatbot became an ASCII art printer that creates differently "dense" areas with a small selection of characters.
How it works
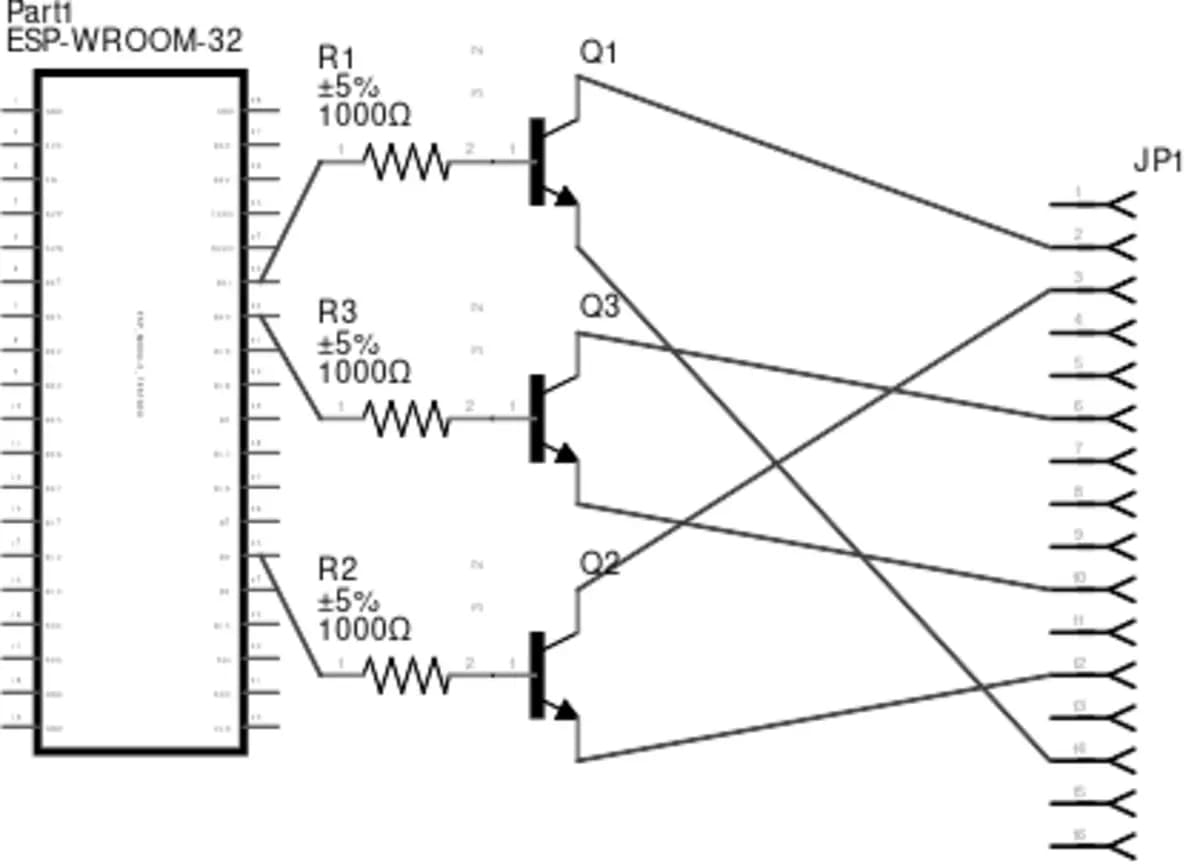
Schematic of the control circuit: each ESP32 pin switches an NPN transistor via a 1 kΩ resistor, which simulates a key contact of the typewriter.
- Simulate keys electronically. Seven pins of the ESP32 are each connected via a 1 kΩ resistor to the base of an NPN transistor. When the ESP32 sets a pin HIGH, the transistor conducts and connects the corresponding points of the keyboard matrix — to the typewriter, this looks exactly like a real keystroke.
- Define the character set. This way the keys W, A, N, 0 as well as space, line break, and shift can be triggered. Combined with shift, this yields the lowercase letters "w", "n", "a" and an additional character "=" — nine characters in total:
WNA0wna=. - Convert image to ASCII. For the conversion I adapted an existing Python script by vietnh1009 (an image-to-ASCII generator), which converts an image to grayscale with OpenCV, divides it into 6×12-pixel blocks, and calculates the average brightness (0–255) for each block. This brightness is mapped to one of the nine available characters — from " " (very bright) to "W" (very dark).
- Print. The resulting character string is added as a constant to the ESP32 code. A loop goes through the string character by character and switches the matching transistor via a
switchstatement — including the shift key for capital letters and "=". After 72 characters the ESP32 triggers a line break and waits briefly so the print head can travel back.
The result: the same smiley, printed with only nine characters — W, N, A, 0, w, n, a, = and space.
Challenges
The biggest challenge wasn't the electronics, but understanding the typewriter itself. Without a schematic, I had to reconstruct the keyboard matrix by systematically short-circuiting pins and measuring voltages (between 0.5 V and 4.9 V per key) before it was even clear which pins were responsible for which keys.
Two days of work went into the chatbot approach before it turned out that reading and triggering the entire matrix would burst the scope of the module. In hindsight that was an important experience: an end-to-end prototype — even a very rough one — would have made this bottleneck visible much earlier, instead of discovering it only after detailed work on a subproblem.
Implementing the ASCII printer itself raised further practical questions: which ESP32 pins are reserved during boot and must not be used for the transistors? How long does a simulated keystroke have to last for the mechanism to react reliably? And how much pause does the print head need after a line break before the next character comes? These values — around 50 ms per keystroke and 2 seconds of pause after each line break — could only be determined experimentally.
Parts list
- 1× Smith Corona XL 1875 (digital typewriter, Intel P8052AH mainboard)
- 1× ESP32 (ESP-WROOM-32)
- 7× NPN transistors
- 7× 1 kΩ resistors
- Python with OpenCV for image-to-ASCII conversion
Conclusion
The idea of a typewriter chatbot became a much smaller but working project: a printer that puts images on paper with just nine characters. The path there — reverse-engineering an unknown keyboard matrix, using NPN transistors as simple switches, and deliberately narrowing the project's scope — was in the end more instructive than the originally planned result.
More on this moment of replanning, and what I took from it for other projects, is in my learnings from university.
There's a video with a code walkthrough and the typewriter in action here: youtube.com/watch?v=Alc8yV_B-lY